Psychoacoustics on a Raspberry Pi
Soon I hope to start a new research study (more on this in future posts, I hope). The study will ask participants to perform various listening tests, and I need some hardware to administer those tests.
I think I can build something to suit my needs based on the Raspberry Pi. I thought it might be useful keep a public record as I build this system, so that others may learn from my experiences.
For anyone who hasn't heard of them, Raspberry Pis are single-board computers (SBCs) made by the Raspberry Pi Foundation. They were originally intended as teaching tools for schools and developing countries, but thanks to their small form factor, versatility, low power consumption, and reasonably low cost, they quickly became more popular than the developers anticipated and are now used in all sorts of projects.
While there are many other SBCs on the market, reviews suggest that Raspberry Pis are the best options for most people, mostly because there is such fantastic manufacturer and community support.
Unfortunately, due to the international chip shortage, Raspberry Pis are as elusive as hen's teeth at the time of writing. Because most retailers don't allow backordering, it is extremely difficult to buy a Pi at the moment. Check out https://rpilocator.com to see whether this is still true as you are reading this, and where they are in stock, if at all.
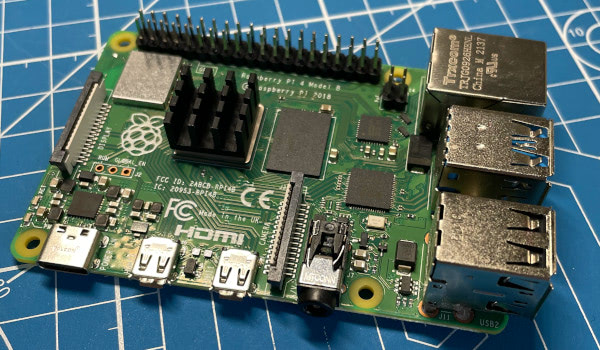
Luckily, I already own this Raspberry Pi 4 Model B 2GB, which I'll be using for this build.

The complete specification of the Model 4 B is available here, but for my purposes, the most important features are:
- An overclockable quad core processor
- Wi-Fi
- Bluetooth
- Two universal serial bus type A (USB-A) 2.0 ports
- Two USB 3.0 ports
- Two micro high-definition multimedia interface (HDMI) ports
- Display serial interface (DSI)
- Camera serial interface (CSI)
- USB-C power connector
- 40 general-purpose input/output (GPIO) pins.
I'll be making extensive use of all of these features in this project.
The major potential issue with this device is that it has just 2 GB of memory (RAM). I would prefer the 4GB or 8 GB models, but as I mentioned, they are difficult to buy. I don't think this small amount of RAM will cause me serious issues, but I'll have to wait and see.
By all accounts, the Model 4 B can run hot, especially if overclocked. Overheating can cause computers to wear out very quickly, so many have built-in throttling. Raspberry Pis throttle at about 80° C. When the Model 4 B first came out, some people suggested that cooling was often necessary to prevent throttling in many situations. Although the manufacturers updated the firmware improve the situation and this seems to have partially worked, I anticipate running the Pi pretty hard and in some sort of enclosure, so I bought a 14 x 14 x 8 mm heat sink.

I attached this heat sink to the central processing unit (CPU) using the adhesive thermal tape it came with.
Opinions differ about whether these small heatsinks actually help, but it was very cheap and I'm sure I can remove it later if need to. I do plan to use a fan eventually.
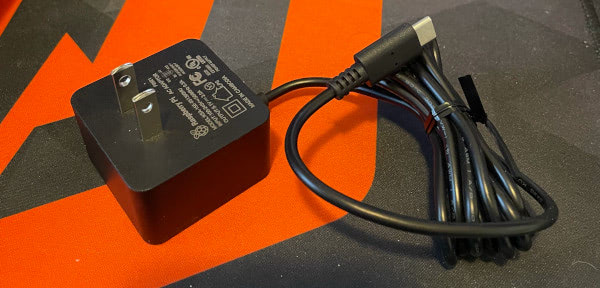
Raspberry Pis don’t ship with a power adapter. There are three important considerations when selecting one. First, Raspberry Pis require between 4.75 and 5.25 V of direct current (DC). If you provide a lower voltage, the Pi probably won’t turn on. If you provide too high a voltage, you risk destroying it. Ideally, the power adapter should provide a nominal voltage of just over 5 V, because the voltage can drop when large amounts of current are drawn quickly.
The second consideration is current. Since the Model 4 B consumes between 3 and 6 W of electrical power, depending on load, the adapter needs to supply al least 1.2 A. But the adapter should also provide enough current to any peripherals attached to the Pi unless they are powered by some other source themselves. I'm going to be using lots of peripherals, and some of them will draw non-trivial amounts of extra current.
The third consideration is safety. Many people online advise against buying cheap, no-brand power adapter from Aliexpress or similar shops. I'd prefer no to electrocute myself or start a house fire.
I didn't feel that searching around for a cheaper adapter was worth my time at this point, so I went for the official Raspberry Pi Power Supply 5.1V 3A with a USB-C plug. Perhaps 3 A will not be enough for all my peripherals, we shall see.
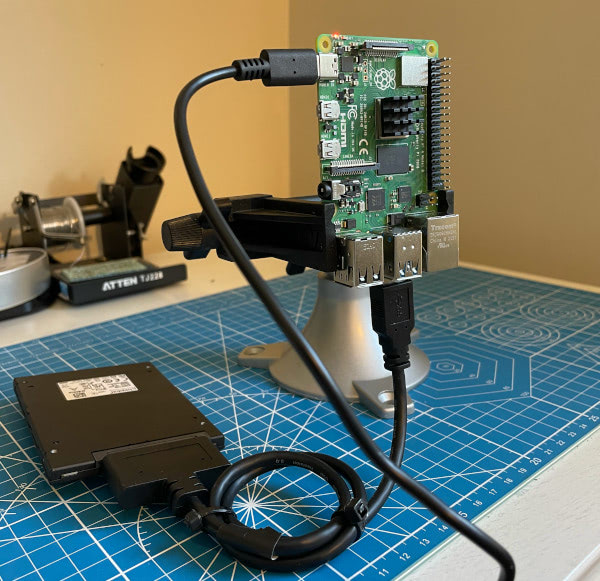
The Raspberry Pi is still not ready to use: it needs a storage device containing an operating system (OS) to boot from. There is a micro SD slot on the Pi for this purpose, but will use a sold-state drive (SSD) instead. SSDs have greater storage capacity than similarly priced SDs, are much faster, and are much less likely to fail. The downsides are that SSDs use specific connectors that Pis don't have, such as SATA or M.2, so they need to be adapted to USB, and they draw more power.
In the past, booting a Pi from a USB device for the first time was a bit cumbersome. You had to burn an OS image onto a micro SD card first so you could enable USB booting from the Pi. However, with the newer versions of the Pi 4, USB booting is enabled by default.
Based on this webpage, I decided on a Kingston 240 GB A400S. SATA drives are not the absolute fastest, but they are many times faster than any micro SD option and cheap. I picked up the recommended StarTech 2.5" SATA to USB 3.0 Adapter as well. There is a version of this adapter for USB 3.1 for an extra dollar, but the Pi doesn't have 3.1 ports.

This is the bare minimum hardware necessary to yield a functional Raspberry Pi, so now II'll put everything together and turn it on.
You may notice that I haven't mentioned any input peripherals (keyboard or mouse) or a display. That's because I'll be using the Pi remotely via my home Wi-Fi network for the time being. My second computer is a Mac desktop, but it doesn't matter what it is, so long as it's connected to the same Wi-Fi network as the Pi and has a free USB-A port.
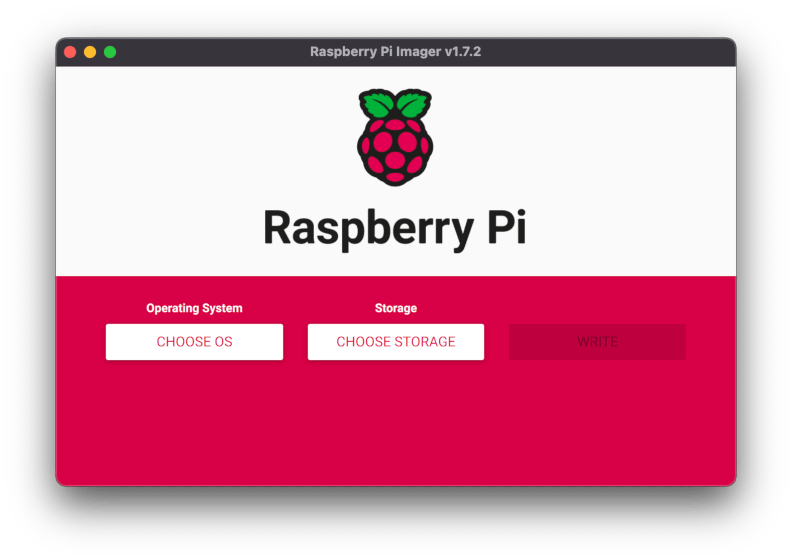
Before touching the Raspberry Pi, I installed the Raspberry Pi Imager tool on my second computer. Then I plugged the SSD into the second computer (not the Pi) and used the imager tool to install Raspberry Pi OS (formerly called Raspbian) on the SSD.
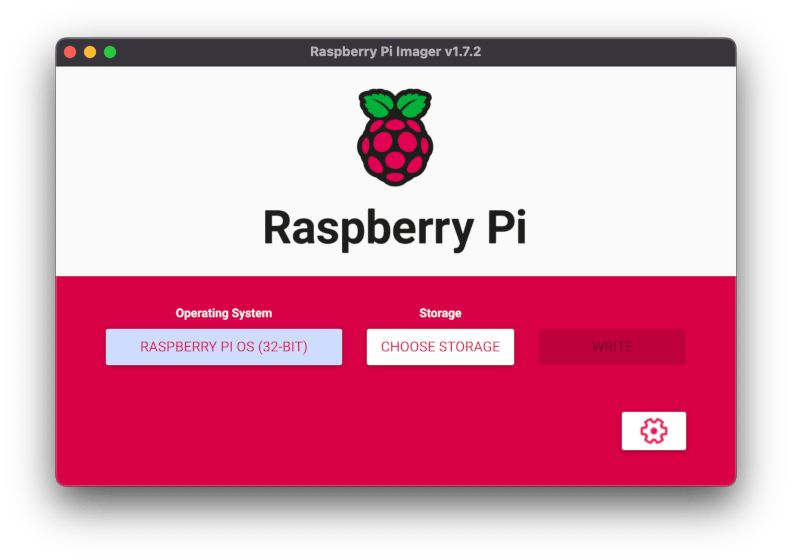
 The imager tool can install several different OSs. I used the recommended version of the official OS, which is the 32-bit version at the time of writing. Although the Pi 4 has a 64-bit processor, the 64-bit OS is not fully featured or stable, and the potential gains in performance are not worth the sacrifices.
 Once an OS has been selected, a cog symbol appears in the tool which provides a number of advanced options. The important ones for my purposes are:
- Set the computer name (hostname)
- Enable secure shell (SSH)
- Pick new username and password (the defaults are not secure)
- Configure Wi Fi access
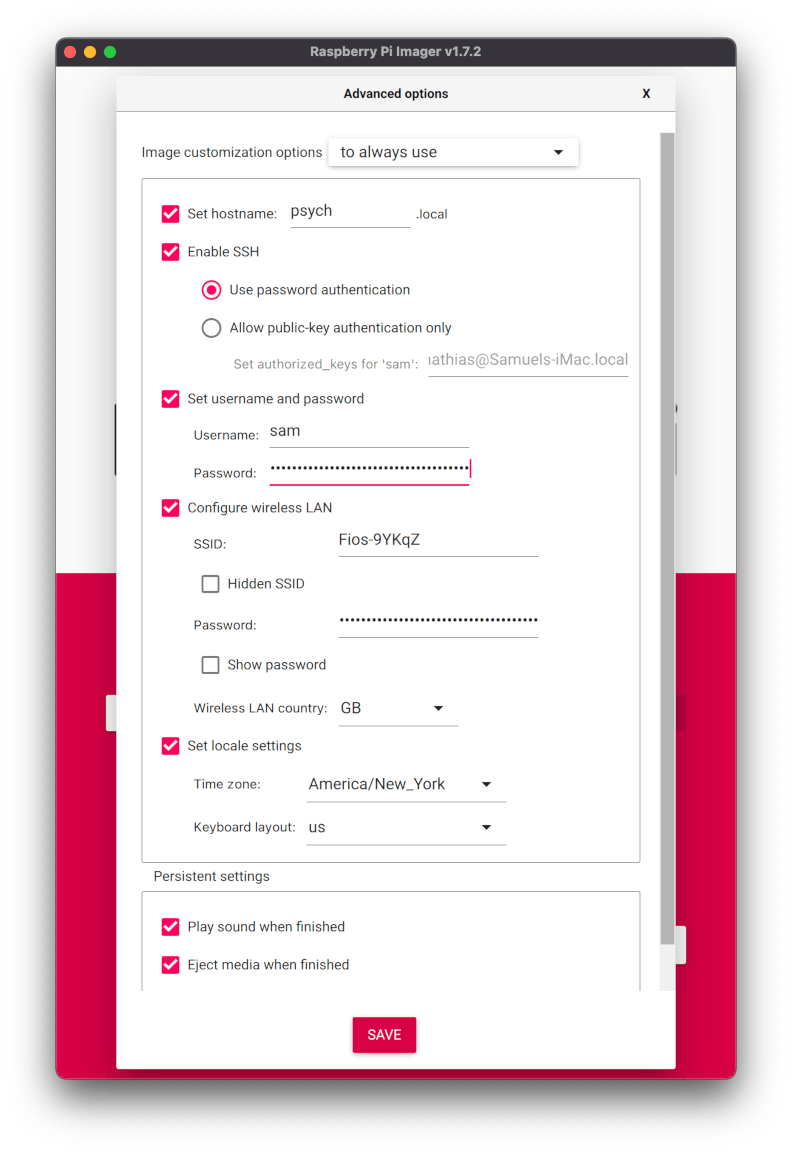 Oh, and it's vitally important to select the correct drive before formatting and installing. My mac hard drive didn't appear on this list, but I did have a number of other drives plugged in and it would've been a disaster if I had wiped any of them.
Burning the OS took a few seconds (SSDs are really quick!). Once done, I unplugged the SSD from the second computer, plugged it into one of the USB 3.0 ports (the blue ones) on the Pi, and finally plugged the power adapter into the USB-C port and the mains. Since I don't have a case yet, I put the Pi in a vice to make plugging and unplugging peripherals nice and easy (and because it looks cool).
It took around a minute for the green LED to stop blinking on and off, indicating that the Pi was fully initialized. After that, I logged in to the Pi via SSH from my second computer by typing the following command in a terminal.
ssh {username}@{pihostname}.local
Obviously, {username} and {pihostname} were particular to the values I specified when burning the OS image. The terminal prompts for the password (also specified when burning the OS) before logging in.
Once logged in, I updated everything using the following commands.
sudo apt update
sudo apt full-upgrade
sudo rpi-update
sudo apt autoremove
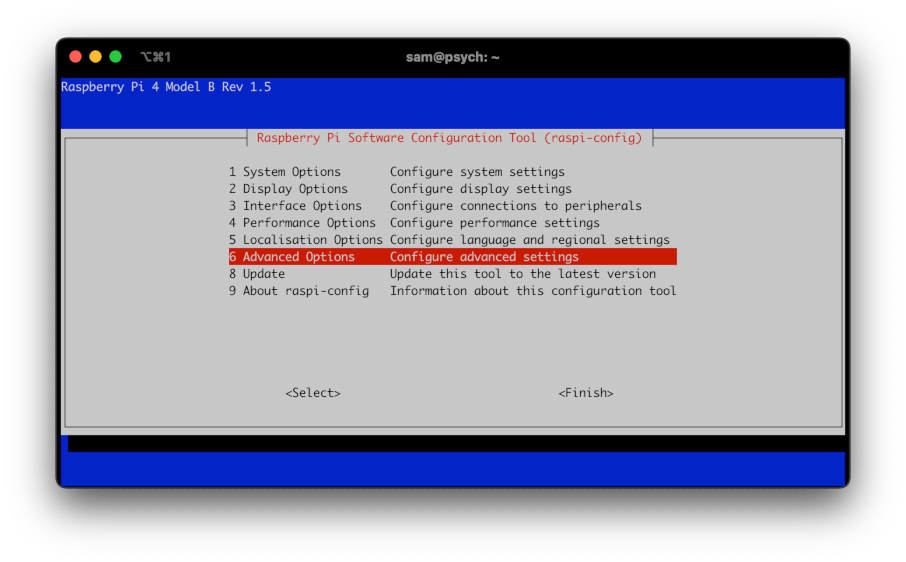
sudo raspi-config
A rule of thumb when working on a Raspberry Pi is that you have to use sudo for virtually everything. I find myself always typing sudo even when I probably don't need to.
The final line containing raspi-config brings up the Raspberry Pi Software Configuration Tool, more commonly known as the BIOS. There are a lot of important options here, so it's good to know about. For now, I just selected 6 Advanced Options followed by A1 Expand Filesystem.
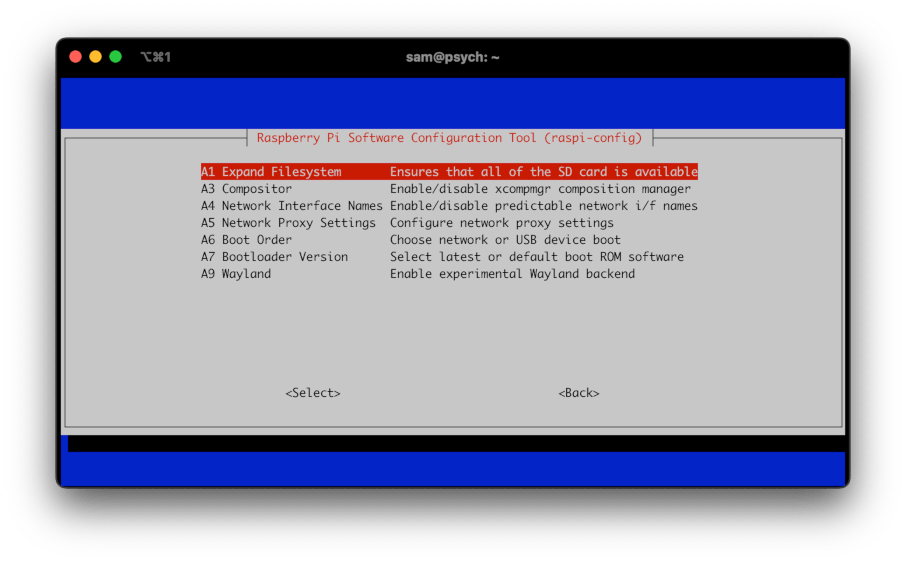
I'm not sure if expanding the filesystem was actually necessary, but I did it anyway.
That's it for now. In future posts, I'll try to do useful things with this computer, such as playing sounds and collecting psychoacoustical data.